How To Winterize A Swimming Pool:
A step-by-step guide to help you Winterize A Swimming Pool in Simple 10 Steps. You’ll save time, money, and frustration during Winterize your pool.
When the heat of the summer is on, we all go to one place to chill out – the pool. Swimming pools are probably the place where most people hang out during the summer. It gives us so much fun and relaxation that some of us almost find it impossible to leave the pool. Unfortunately, the cold weather of the winter season has to rob us of that fun time. We all end up cuddling in bed to save ourselves from shivering from the cold weather. And when winter comes, it’s not just the people who need saving. Your pool does too.
How do you save your pool from winter?
You WINTERIZE your pool. For new pool owners or those who don’t own a pool, the word “winterize” your pool might seem to be an alien word. You might even think that it means you just simply have to drain your pool to keep it safe from winter. Winterizing your pool doesn’t mean draining all the water out. Winterize simply means you are preparing your pool for the winter season without actually draining all the water.
What happens when you don’t winterize your pool?
When you choose not to winterize your pool, you’re either draining all the water out or just leaving it there until the winter season comes. Whatever option you choose between the two, you are literally digging up the grave for your pool.
 Choosing to drain your pool in preparation for the winter is definitely a terrible idea. You would just be shortening the life of your pool because the cold weather makes it less durable. When you don’t drain your pool, the water inside helps to protect the liner from drying out. Without the water, the cold weather will cause cracks and other kinds of damages to the liner wear of your pool. In addition, once the winter is over, you’d have to pour water again into your pool and it will definitely cost you more money.
If you choose not to drain your pool, but just completely leave it open and without any preparations for winter, then you’re about to have your worst nightmare. Perhaps you have thought to turn your pool into an ice skating rink during the winter which is probably a pretty creative and resourceful idea –if only it didn’t have a lot of drawbacks. When the water in your pool starts to freeze, it will expand and cause tears and cracks to the liner, plumbing system, filter and pump of your pool. And once the spring comes, you’d just realize you won’t be able to use your pool because of the tons of repairs your pool is going to need.
Well then, perhaps you’ve also thought of running the heater during the winter to keep your pool working. However, you’d have to prepare your wallets because it will horribly cost you a lot of money to pay for the electricity and maintenance. Another reason which makes this option impractical is the unexpected blackouts due to snowstorms. Without electricity, your pool’s plumbing and filter system will shut down and start to freeze. And this leads to an unpleasant algae infestation in our pool. The cleaning part of the pool will then again cost you a lot of money.
A step-by-step guide to help you Winterize A Swimming Pool in Simple 10 Steps.
You’ll save time, money, and frustration to Winterize your pool.
The thought of winterizing your pool may sound confusing or may make others, especially the new pool owners, to feel jittery on whether they’d be able to do it correctly or not. Well, rest assured that winterizing your pool isn’t as difficult or complicated as it sounds. Through these 10 easy and simple steps, your pool can be saved from the winter season.
Measuring the size and volume of your pool.
- Knowing the measurement and volume of your pool is necessary for ordering or buying the right materials and amount of chemicals that you will be using to winterize your pool.
-
Preparing the materials you’ll be needing for winterizing
- First, you will be needing a liquid test kit or some test strips for testing the pH and chlorine levels as well as the alkalinity, acid demand, bromine, and calcium level. Though you can bring your pool water to a pool supply store for testing, these readily available liquid test kits and test strips at many pool supply stores save you more time and money since you’re going to need it a lot anyway.
- For the water treatment, you’ll be needing a winterizing kit that provides you with a complete set of chemicals that you will be needed for treating the water of your pool. But if you want to buy them individually, you have to buy a pH increaser, alkalinity increaser, calcium hardness increaser, algaecide and pool shock. Stain prevention and metal sequestering chemicals can be optionally used for your pool as well, depending on the kinds of materials your pool is made of.
- Other materials that you’ll need to prepare are water tubes, pool cover, leaf net, rubber plugs for the return plugs and skimmers, skimmer plates, winter cable wires, winches, cover clips, and pool pillow.
-
Cleaning your pool
- When you winterize your pool, you’re like preparing it for storage. And whenever we’re about to store something, we make sure that it’s clean first. Therefore, cleaning your pool is a necessary part of winterizing it. Begin with removing any floating objects or materials on your pool. Skim the surface. Clean any large dirt and debris with a leaf rake. Brush and vacuum the sides and bottom of the pool.
-
Testing the chemical levels of your pool
- Before you can proceed with treating your pool, you must first find out whether the elements in your pool are balanced. Knowing the chemical levels of your pool tells you which needs adjustment or if it even needs some treatment.
- For the testing of chemical levels, use the liquid test kit o test strips that you prepared beforehand. The pH level of your pool must be between 7.2 and 7.6 while the chlorine levels need to be at 1-3ppm (parts per million). Pool maintenance experts recommend using Chlorine or Non-Chlorine Shock treatment. Alkalinity and calcium levels, on the other hand, need to be at 80-120ppm and 180-220ppm, respectively. Ensuring to maintain these levels before closing your pool is critical to avoid any problems for your pool water once the winter season arrives and once your water starts freezing.
-
Regulating or treating the chemical levels of your pool water
- Once you’re done testing your pool’s water elements, you now use the test results as guide and basis for adding the chemicals from your winterizing kit. It is important to keep the levels balanced or within the required range of levels to keep your pool from getting damaged during the winter.
- If you buy a winterizing kit, you won’t need to stress yourself measuring and adding various chemicals since these kits contain a mixture of chemicals specially prepared for your pool. You just simply have to follow the instructions included in the winterizing kit. However, if you want to be more hands-on and you choose to buy the chemicals individually, you’d have to add them one by one while ensuring that you are adding the right amount. These chemicals include pH increaser, alkalinity increaser, calcium hardness increaser, algaecide, and pool shock. All of which help in preventing your pool from having stain or bleach liners, equipment corrosion, poor water quality, and plaster damage.
- Algaecide is another chemical you’ll be needing to add. It kills algae and prevents their further growth in your pool so that you won’t be spending a lot of time, money and effort cleaning your pool during your reopening in spring. You can also add stain and metal sequestering chemicals as it helps in removing and preventing stains and rust on the walls and floor of your swimming pool.
-
Lowering the pool’s water level
- When water turns to ice, it expands. This expansion can cause cracks and other damages to your pool’s skimmer and plumbing system. So you have to lower the water level of your pool just one foot below the skimmer. However, you have to monitor the water level of your pool especially if it rains. Make sure that the skimmer is still free and clear.
- You can also choose not to lower the level of water but still protect the skimmer. To protect it, you can choose to put a skimmer cover or plug instead. The skimmer plug is a plate that you put on the skimmer, giving it a secure air and water-tight seal. It provides a secure and durable layer of protection for the skimmer and piping during the winter season.
-
#2🥈 Runner Up🪚 Draining the filter, use best pool water pumps, and other equipment
- Of course, it is not just the skimmer that you’d have to worry about. During the winter season, you also have to make preparations to protect the filter, plumbing lines and pump of your pool. First, blow out the water from each of the plumbing lines. Once you’re done, secure the plumbing lines by putting a plug in the lines at the end of the pool.
- To drain and remove the pool pump, heater, chlorinator, and other pool equipment, you’d have to remove all the drain plugs connected to it. Make sure that there is no water left in each equipment. After this, you can proceed with storing them all together in one place. In this way, it will be more convenient and easier for you to find once you will be installing them again in the spring.
- When it comes to draining and storing the filter, you’d have to check the type of filter you have. Each type of filter has its own procedure of draining and storing.
Cleaning your pool accessories before storing them
- All the gears or other equipment that you have (skim baskets, chlorine tablet containers, brushes, and poles) must be cleaned first before storing them. Keep them in storage which has a room temperature to protect them from the damages of freezing temperatures.
-
Putting the pool pillow
- Before you move on with covering your pool, do not forget to place a pool pillow at the center of your swimming pool. The pool pillow, or also known as the ice compressor, absorbs the pressure of the freezing water as it expands. It also relieves above-ground pool walls from the stress of ice expansion. Another benefit of putting a pool pillow is in reducing the build-up of rain, leaves or snow on your winter cover.
- On an important note, inflate your pool pillow up to 60 % of its capacity only. In this way, the pillow is able to absorb ice pressure expansion more effectively. Ensuring that the pillow stays at the center of the pool also adds to its effectivity. Tying some strings to your pool pillow and to the ledges of the pool will help in keeping it at the center.
-
Covering your pool
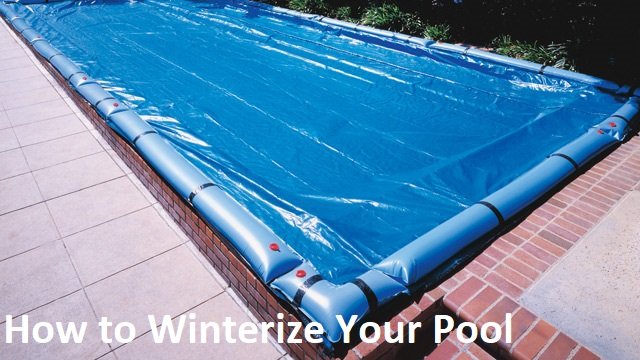
- For the last step of your pool’s winterization, you now have to install the Pool water cover. Extend your cover on all sides of the pool and keep water from getting on top of your cover. To keep your pool tightly sealed and covered, you can make use of winter cable wires and winches and winter cover clips that are available on many online stores and pool supply stores.
- To prevent your pool cover from sliding or jostling during the winter, don’t use bricks, rocks, hollow blocks or any other rough objects that might scratch or tear your pool cover. Use water tubes or water bags on the sides and loops of your pool cover instead.
Now that you’re done with the last step, your pool is good to go for the winter. It’s been prepped, cleaned and put to a temporary sleep with a pillow and blanket. You can rest assured that once the spring comes, your pool will be ready again for another fun-filled swimming experience.
Read our topic related to pool guide: