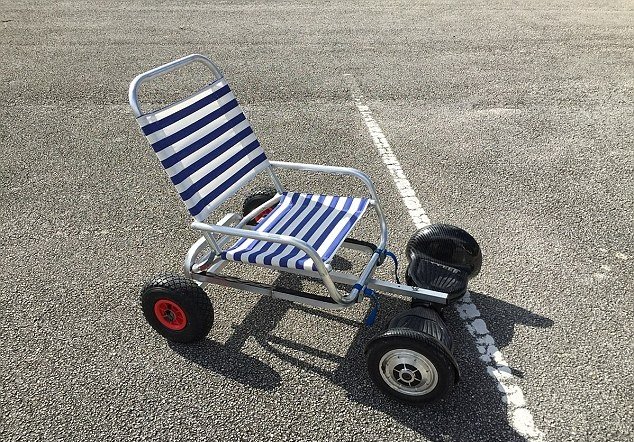
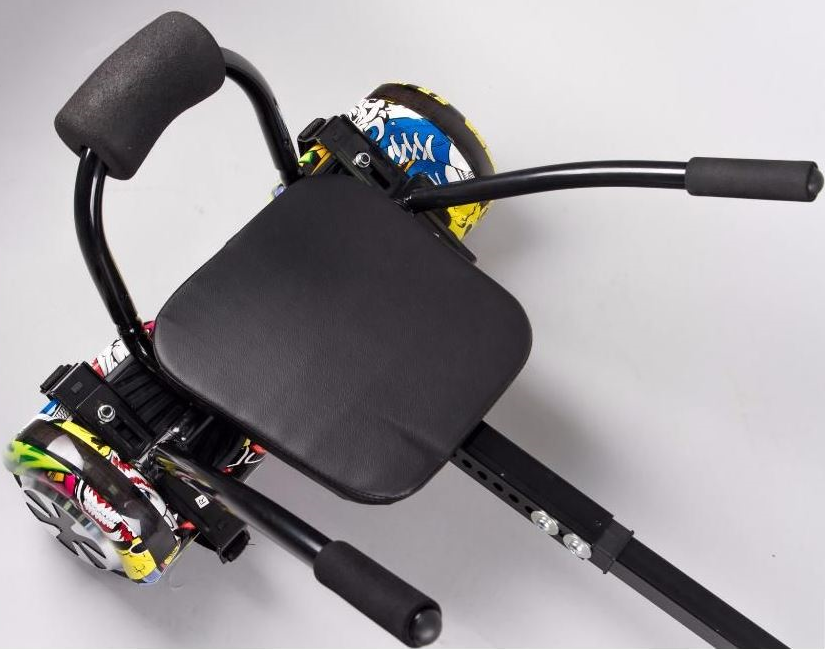
Hoverboards revolutionised transport. Ok, not quite. But they were still pretty amazing. Everyone has them these days, and it’s only logical to take the craze further and introduce hoverboards for people who like to sit! So, like a car, but it runs on electricity. An electric car! Wait…
Why Put a Chair On a Hoverboard? – How To Make a Hoverboard Chair

It’s not just that people get tired standing and pressing their feet around to move, you know. Balancing a hoverboard can be tough. Just look at the number of fail videos on Youtube with hoverboards in them! (psst! We’ve put one for you in the end)
Those who have slow reflexes or difficulty in balancing due to physiological issues, old people as well as people with disabilities often find it impossible to use hoverboards. It is understandable. There are companies out with seat attachments to add to your hoverboard. But they are not always cheap.
Why Make Your Own Chair Attachment For Your Hoverboard?
Making a chair attachment for a hoverboard is cheaper than buying it. That’s the plain and simple reason. But there are other advantages to avail too.
For example, you get to decide what sort of chair you want to put on your hoverboard. You can pick the design, whether you want metal, wood or plastic, and more. And If you’ve built your own hoverboard, attachments from the market might not fit your design, and so making your own tweaks can be a much more profitable deal.
1. Making Your Own Hoverboard Chair: The basics

The beginning and end of a hoverboard are in the design. You have to begin with planning out what chair you want, the dimensions you will be comfortable with, how much leg space you need and more. Do it wrong, or rush through it, and your chair will probably be imbalanced, and you’ll end up having to trash the entire contraption.
Once the design is done, you need to design a chassis and construct it. Depending on what material you choose, the steps can vary. Getting wheels of a proper radius, fitting them with bearings and axles and then screwing the entire thing together takes time and effort. But do it right, and your hoverchair is going to turn out amazing.
The final step is to make provision for safely positioning a chair. Make sure the chair doesn’t slip out or about. One way to do that is to position wooden blocks around the legs of the chair and screw them into place. You can alternatively also employ metal pipes that can be screwed or welded into place. However, this will mean you can place only one sort of chair on the chassis. So make a good choice, or see if you can make provisions for more chairs to be placed securely.
Finally, make an arrangement to connect your chassis to the hoverboard and you’re done!
2. Ideal Material For Your Chassis:
The best option when making your chassis is one that is light and durable. Wood and aluminium often fit the bill. You can also improvise with plastic since plastic and fibre sheets can be easy to mould into your desired shape. However, material like iron that is heavy and rusts can spoil your hoverboard chair’s beauty.
Choose wood for its heat insulation, lightweight and resistance to rust.
Choose Aluminium for the light weight, durability and high strength of joints.
3. Fitting Motors On The Wheels?
A lot of people wonder if adding electric power to the chassis wheels can help the hoverboard move quicker or the battery to last longer. Or perhaps it can go faster? While motors in the wheels and a battery compartment under the chair can be easy to accommodate, it will not make your hoverboard chair be any better.
4. Here’s Why?

Hoverboards change acceleration the more you press down the footrests. On the other hand, electric motors work at at most 2 speeds. It is great when the speeds match. Smooth sailing. But when they don’t, the slower wheel tends to slip on the floor. It is bad for the wheel because the tyre suffers a lot of wear and tear that it is not designed to resist.
5. Fitting Handles On a Hoverboard Chair
Steering a hoverboard can be a tough task for a lot of people. And while it is not possible to attach a handle to a hoverboard (or basically you get an electric scooter), you might find it useful to make a handle for a hoverboard chair.
A U-shaped metal rod/pipe that fits over a footrest can do the trick. Making one can be easy. Putting only one handle works as well, though most feel more comfortable with two. You can get cycle handle insulation from the hardware shop to put over the upper end of the rod.
6. Additional Accessories To Add To Your Hoverboard Chair

There’s a lot of other things you can add to your chair to transport with your hoverchair. The only thing to watch out for is whether you can steer the entire contraption comfortably. That said, here are a few good ideas to try out.
Going to the beach? You can carry your surfboards in a short trolley.
At the park for a picnic? Take some sandwiches under your seat, or have them follow you with an attached arrow.
Can’t drive to the mall but have a lot of groceries to carry home? Maybe the store could lend you their trolley for a while. You can attach it to your chair and hover home.
There’s a lot you can do with a hoverboard chair. The only problem with the concept is that the more additions you make to your hoverboard, the lesser weight you can carry on it. Getting the best hoverboards shouldn’t get you any more than a few extra pounds. So it is best to be judicious with what you attach to your hoverboard.
And yes, as promised, here’s a hoverboard fail video for you to enjoy. Have fun!
https://www.youtube.com/watch?v=gaVPQp5goZ4


